How to Install and Use Linux Screen Commands
Introduction
Have you ever encountered a situation where you’re executing a time-consuming task on a remote machine, only to have your connection abruptly terminated, your SSH session cut short, and your progress lost? If this sounds familiar, you’re not alone. Fortunately, there’s a lifesaver called “screen” that enables you to resume your sessions seamlessly.
Understanding Screen
Screen, also known as GNU Screen, functions as a terminal multiplexer. It allows you to initiate a screen session and open numerous windows (virtual terminals) within that session. Even if you encounter disconnections, processes running on the Screen persist, ensuring continuity.
Installing GNU Screen on Linux
On most contemporary Linux distributions, the screen package comes pre-installed.
Confirm its presence by entering:
screen --versionOutput
Screen version 4.08.00 (GNU) 05-Feb-20If it’s not installed, you can easily install this using your distro’s package manager.
For Ubuntu and Debian users:
sudo apt update
sudo apt install screen
For CentOS and Fedora users:
sudo yum install screenGetting Started with Screen
To commence a screen session, simply type the following in your console:
screenThis initiates a screen session, creates a new window, and launches a shell within that window. The command line looks just like a regular terminal window.
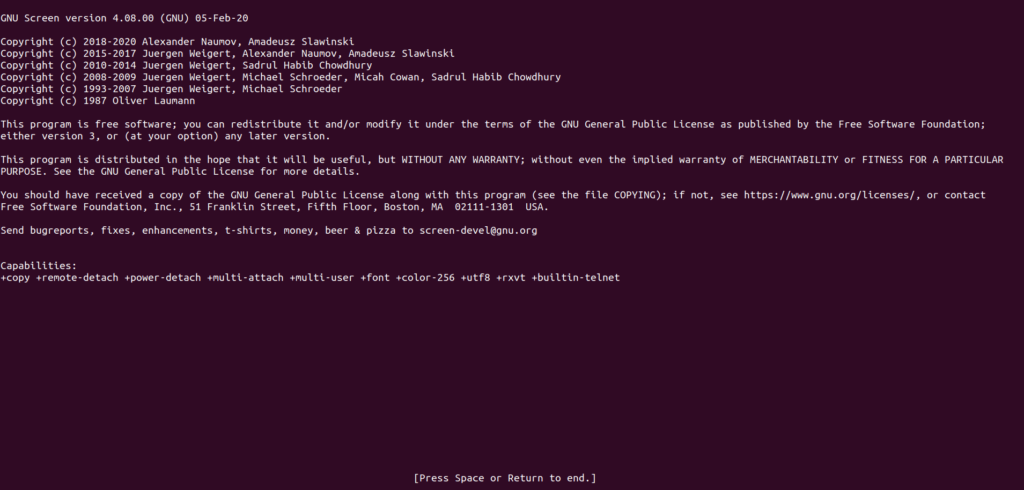
The initial launch begins with a brief licensing agreement displayed on the screen. Press Space to continue to the next page or Return to end.
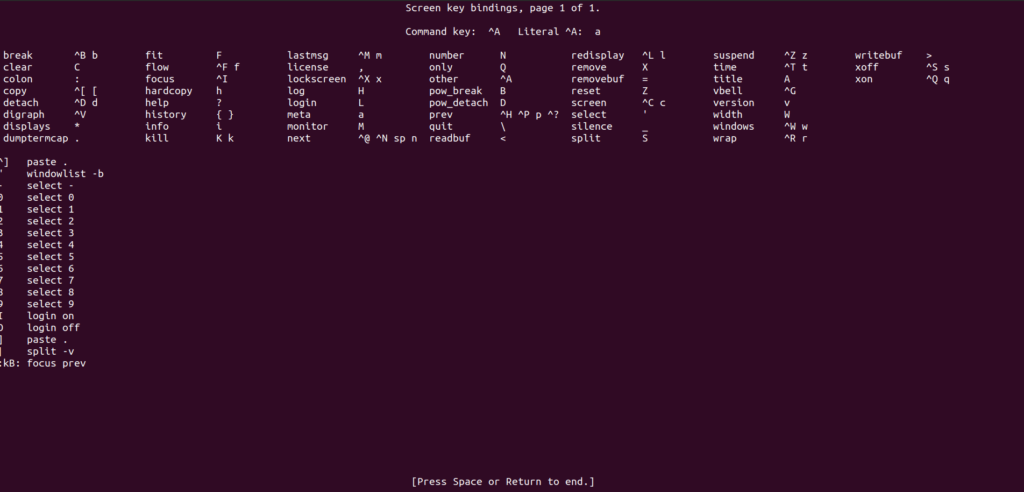
To manage screen shells, use Screen keystrokes (in most cases, Ctrl + a, followed by another key). To see a list of available commands press the keys Ctrl + a, followed by ?
Creating Named Sessions
When managing multiple screen sessions, using named sessions is advantageous. Create a named session with:
screen -S session_nameIt’s always a good idea to choose a descriptive session name.
Detaching and Reattaching
Detach from the screen session at any time by typing:
Ctrl+a dThe program within the screen session will persist even after detaching.
Reattaching detached screen
To resume/reattach your screen session, use:
screen -rIf multiple screen sessions are active, append the screen session ID after the -r switch. Each screen session has a different ID and you can see the session ID list with the command
screen -lsOnce you have the ID, add it to the screen -r command
screen -r sessionIDFor example, to restore screen 1262.run_script, run:
screen -r 1262.run_scriptReattaching attached screen
You won’t be able to reattach to a screen which is already attached. In that case, you would have to detach it first. Use -d flag to detach. This will detach the other user who is connected to that screen.
screen -d -r 1262.run_scriptReattaching attached screen without detaching
If you don’t want to disconnect other user who is attached to a screen then use -x flag. With this, multiple user can be connected to a screen.
screen -x 1262.run_scriptKilling Screen
Inside the screen: When you want to quit screen and kill all of your windows, use Ctrl-a and \. If you want to kill just the window, use Ctrl-a and k. If there will be just one window then the screen session will also be killed.
Outside the screen: If you are detached from the screen and want to kill the screen, use screen -ls to get the screen list then
screen -X -S {session you want to kill} quitIf quit parameter is not working then you can try exit
Managing Screen Windows
Upon starting a new screen session, a single window with a shell is generated. Multiple windows can exist within a Screen session.
To create a new window with a shell, press:
Ctrl+a cThe first available number from the range 0…9 will be assigned to it.
The sequence Ctrl-a c initiates the creation of a new window, allowing us to execute various commands without disturbing the ongoing monitoring in the original window.
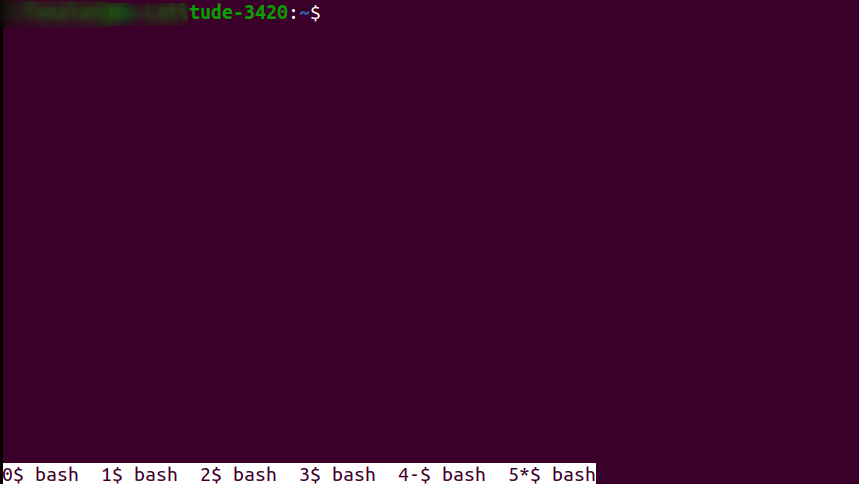
Wondering where that initial window went? You can return to it using Ctrl-a n.
This command navigates to the next running window. When there are no windows beyond the current one, the list wraps around, bringing us back to the first window.
To switch to the previous window, use Ctrl-a p. If, for instance, you have three windows and are currently on the third, this command will shift you to the second window.
The shortcut Ctrl-a Ctrl-a proves handy for efficient toggling between two consecutive windows.
Common Commands for Managing Screen Windows:
- Ctrl + a and c – Open a new screen window.
- Ctrl + a and “ – List all open windows.
- Ctrl + a and 0 – Switch to window 0 (or any other numbered window).
- Ctrl + a and A – Rename the current window.
- Ctrl + a and S – Split the screen horizontally, with the current window on top.
- Ctrl + a and | – Split the screen vertically, with the current window on the left.
- Ctrl + a and tab – Switch focus between areas of the split screen.
- Ctrl + a and Ctrl + a – Switch between current and previous windows.
- Ctrl + a and n – Switch to the next window.
- Ctrl + a and p – Switch to the previous window.
- Ctrl + a and Q – Quit all other windows except the current one.
- Ctrl + a and X – Lock the current window.
- Ctrl + a and H – Create a running log of the session.
- Ctrl + a and M – Monitor a window for output (a notification pops up when that window has activity).
- Ctrl + a and _ – Watch a window for the absence of output (such as when a file finishes downloading or a compiler finishes).
Customizing GNU Screen
Modify default Screen settings according to your preferences using the .screenrc file.
Below is a sample configuration:
# ~/.screenrc
# Turn off the welcome message
startup_message off

# Disable visual bell
vbell off

# Set scrollback buffer to 10000
defscrollback 10000

# Customize the status line
hardstatus alwayslastline
hardstatus string '%{= kG}[ %{G}%H %{g}][%= %{= kw}%?%-Lw%?%{r}(%{W}%n*%f%t%?(%u)%?%{r})%{w}%?%+Lw%?%?%= %{g}][%{B} %m-%d %{W}%c %{g}]'
Conclusion
GNU Screen is a handy tool for managing tasks on Linux. It helps you avoid losing work during unexpected disconnections by allowing you to resume sessions. With features like named sessions, window management, and customization options, it’s a versatile solution for a smoother workflow. Give it a try and simplify your Linux terminal experience!
See more:

