How to blur sensitive part of your video in iMovie
Many a time while recording a video some sensitive items gets captured in the video. It is essential to blur them before making them public. In this how-to, we will learn how to blur sensitive part of the video in iMovie.
There are multiple ways to do this but we will see the simplest way available currently. Let’s get started. Jump to video tutorial
- Download a blur white image from the Internet
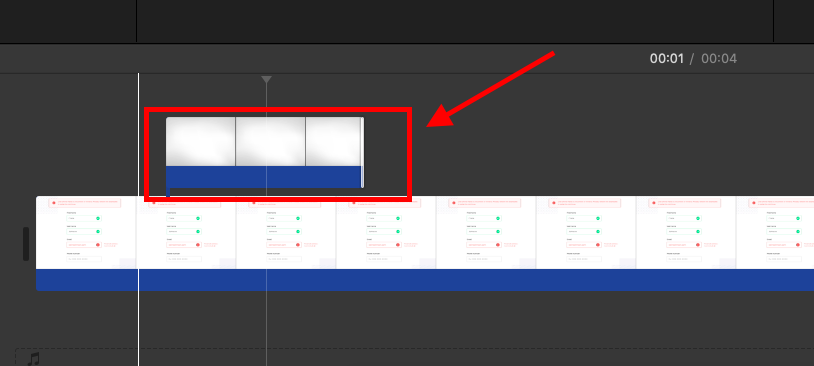
- Add the image to project media and then drag it to the project timeline just above the video track

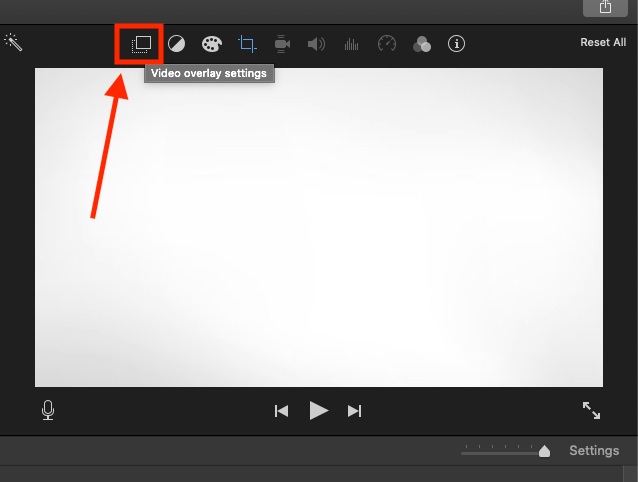
- Then click on the Video overlay settings icon just above the viewer

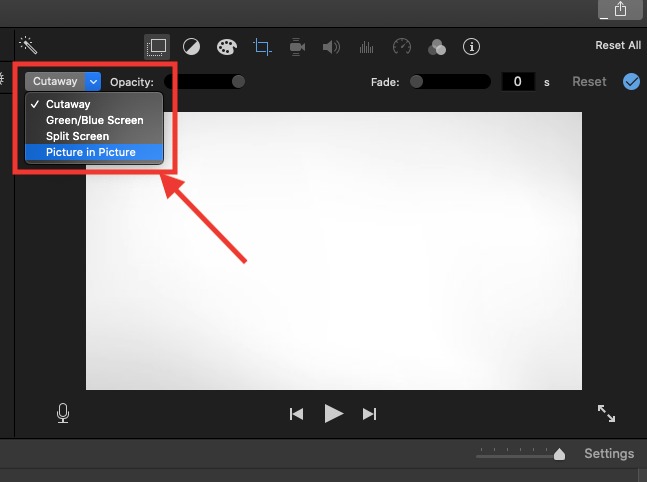
- Once you click on it, it will bring more options to choose from. Click on Choose a video overlay style and select Picture in picture

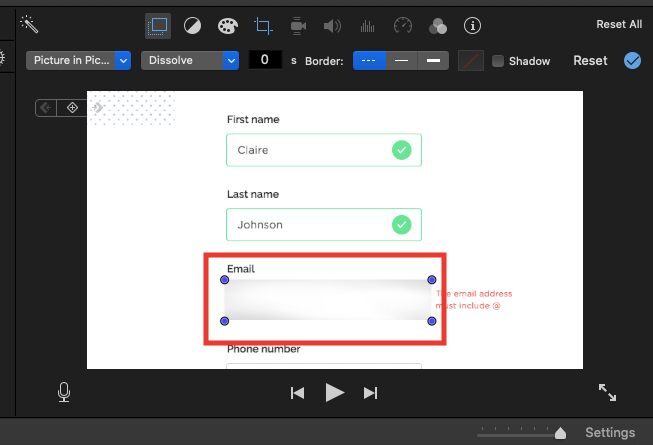
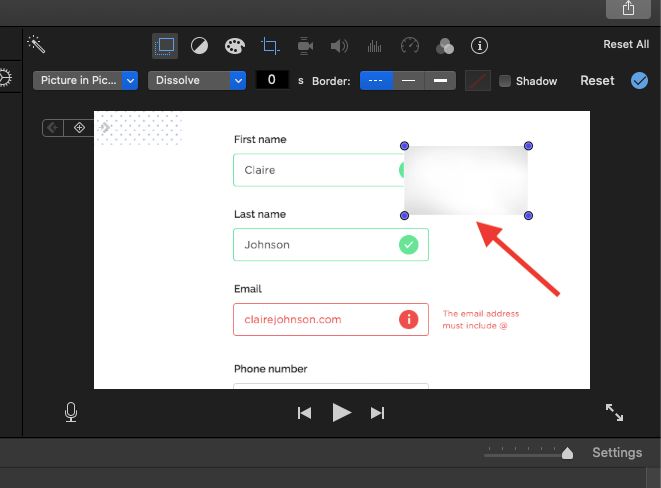
- You can see the image that you added was covering the full area but after clicking on Picture in picture it came inside the picture overlaying your original video

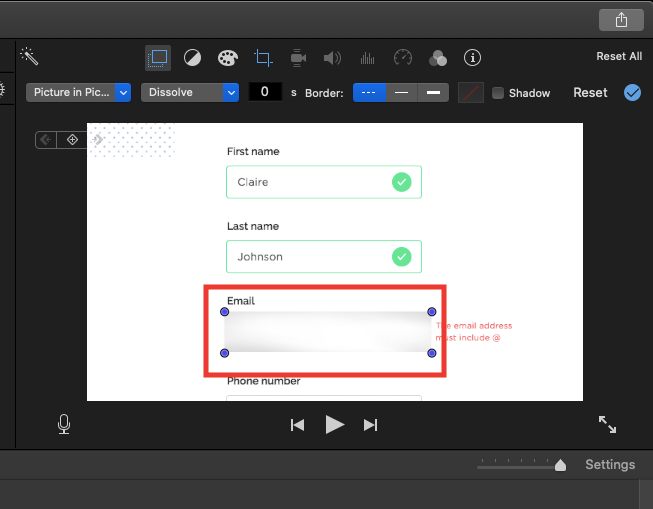
- Drag the image to the part of the video where you want to blur
- Press and hold shift and drag from the blue corner of the image to adjust its height and width

- Adjust the start and end time of the blurred image in the timeline to match the original video sensitive area time
- Export the video. Done, we successfully blurred sensitive part of the video using imovie
Here is the video tutorial in case if you don’t understand.
Note: The video has additional steps to take a screenshot of the part and then blur it and then follow the process that we mentioned above. But you can ignore that part as we are directly downloading the blurred image from the internet
If you want to blur multiple parts of the video at the same video time, unfortunately, you can’t do so in iMovie. For that, you will have to apply a trick. Render the video after you blurred the first part. Again add the rendered video to the project media and add it to the timeline and repeat the process to blur the other parts also.
See more:

