How to render/export finished project in iMovie
If you were using some other video editing software and came to iMovie then you will look for Render options in the menu or somewhere to render your finished project but you won’t find that option anywhere as that option is not available in iMovie. In this how-to tutorial, we will learn how to render/export a finished project in iMovie.
Let’s get started. Jump to video tutorial
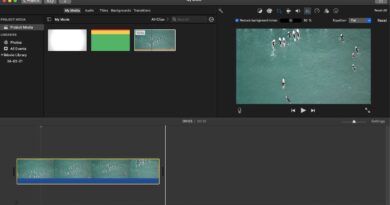
- Add your video to my media and then add to timeline and perform editing as per your requirement
- Once editing is done, click on Share button on the right top corner

- You will get multiple output type to select from. Click on File
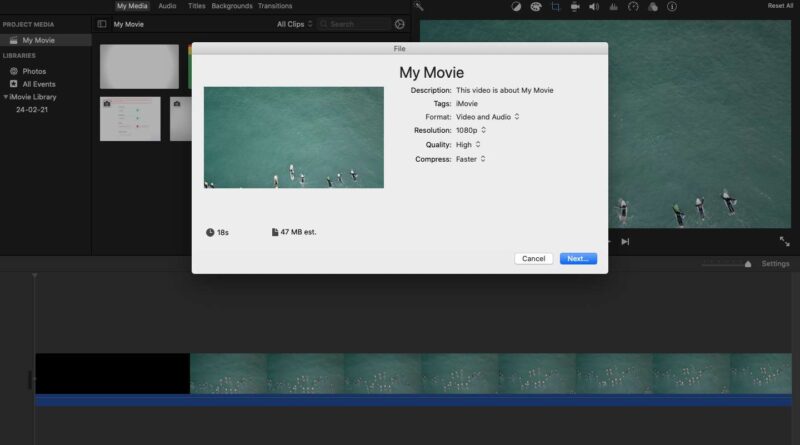
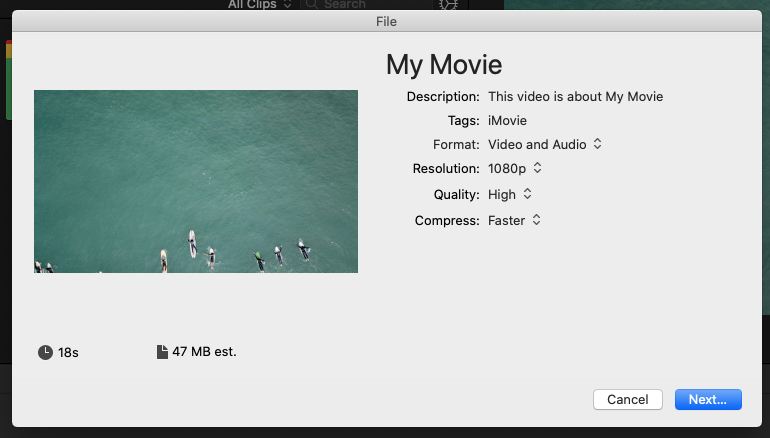
- It will open a dialog box where you can enter the file name, description, tags, format, resolution, quality and compression

- After you have entered the name and description and selected the other settings according to your requirement then click on Next
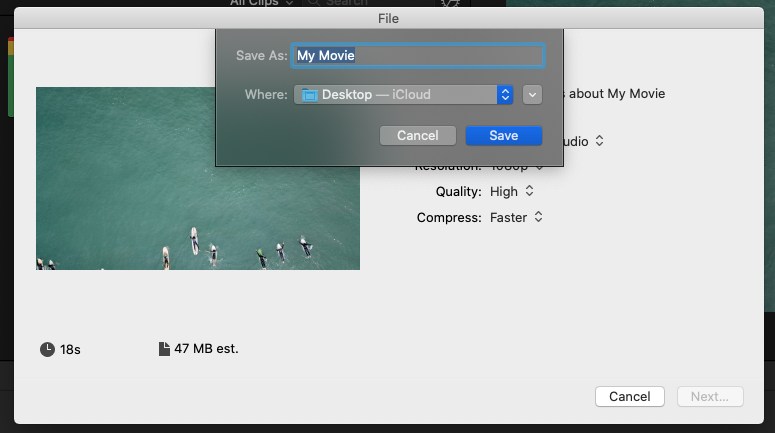
- It will show you a popup where you can alter the file name and select the folder where you want to save the output file. Enter the name and select folder and then click on Save

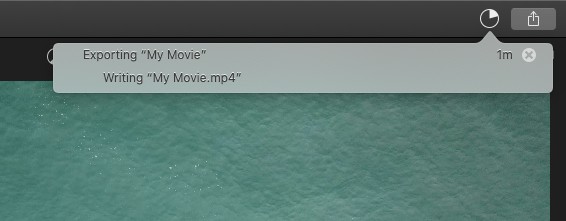
- Just left to the share icon, a new progress bar icon will come. If you will click on it then it will show you how much time it will take to render the project

- If you want to cancel the render then you can click on the cross icon in the progress bar
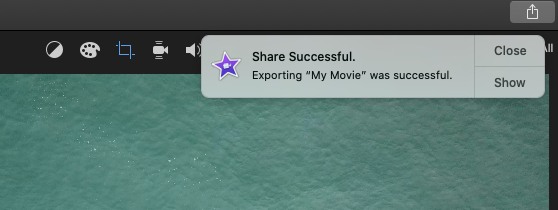
- Once the render is complete, it will show you a notification that Export is successful. You can click on Open or Show to open the output file/folder. That’s all.

Here is the video tutorial incase if you are having any trouble
See more: