How to zoom in/out while recording screen in Mac
While recording the screen on your Mac you may need to highlight part of the screen so that it can be better visible to the viewer. Not only at recording time, but you may also want to zoom a part of the screen at any time. In this how-to, we will learn how to zoom in/out in macOS.
Many people will suggest you download some zooming software but this is not required in Mac as it has a built-in zooming feature. Let’s get started. Jump to video tutorial
- Press and hold Option/Alt + Command and press ‘+=’ to zoom in
- Press and hold Option/Alt + Command and press ‘_-‘ to zoom out
- To zoom in using the mouse trackpad, press and hold the Command button and drag your 2 fingers away from each other or scroll your 2 fingers up
- To zoom out using the mouse trackpad, press and hold the Command button and drag your 2 fingers towards each other or scroll your 2 fingers down
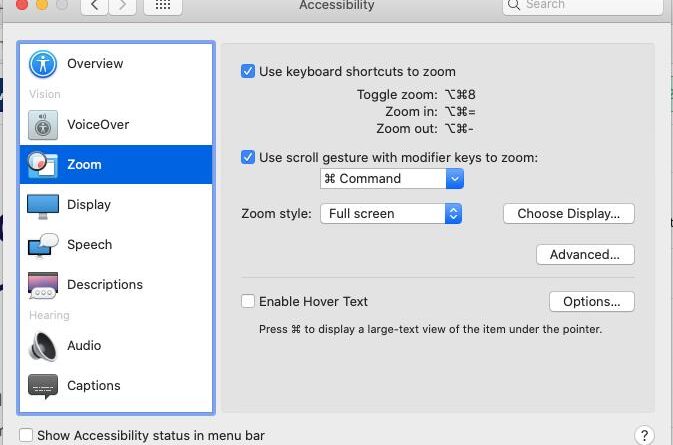
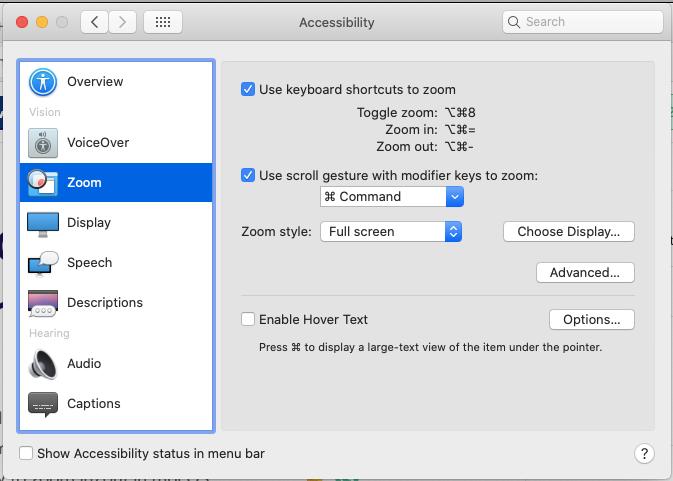
Now if you want to adjust setting for zooming then
- Click on the Apple logo at the left top corner then System Preferences > Accessibility > Zoom
- It will open a dialog where you can enable/disable or set the keyboard shortcut and mouse control and other zooming settings

- Depending upon what Mac version you are using, it will show you some additional settings in this dialog. Modify the settings according to your preferences.
Incase if you do not understand, watch YouTube tutorial here
See more: